One of my favorite features in Adobe Photoshop CS3 was the “Adobe Dialog” section in the “Save As” window. I could add short cuts to certain folders in the left hand menu.
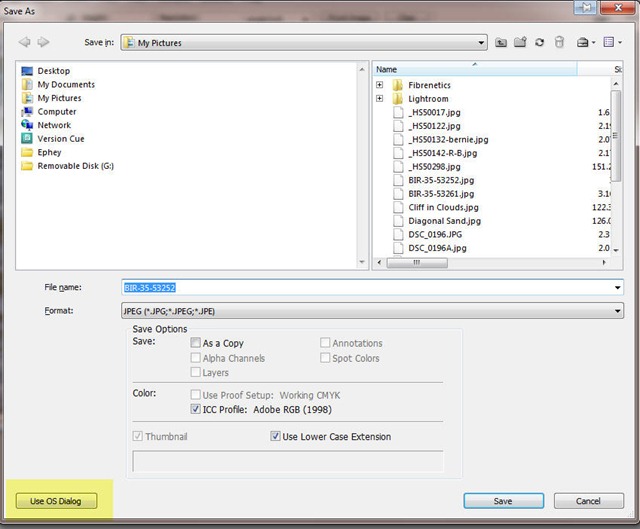
You can see the list of folders in the left hand window above. To add a folder to the list, you would just right click on the folder in the right hand window and choose “Add to Favorites” and when you wanted to remove a folder (or drive) from the Favorites window on the left hand side, you would right click on the folder (or drive) and choose “Remove from Favorites”.
You could also revert to the operating system dialog by clicking the button (highlighted above) in the lower left hand corner of the box. The operating system dialog would look like the one that is shown below. You could revert to the Adobe Dialog by clicking the “Use Adobe Dialog” button (highlighted below).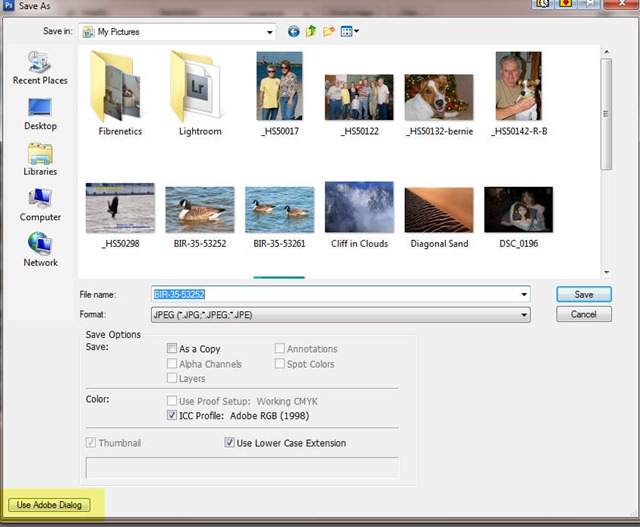
I have three different hard dives on my computer that hold photo files. One holds all my raw files and the other two hold my converted Tiff files. On each drive are many subfolders and when I am processing a lot of images, having to navigate to the correct folder every time that I save something is a real pain.
So when Adobe added this item to Photoshop, I was ecstatic. This made my life a whole lot easier. Then along came Adobe Photoshop CS4 and I could not find the “Use Adobe Dialog” button and all of a sudden, my life became more difficult. I hate it when I have something that I like so much and then it it taken away. I recently found out that Adobe removed this feature from Photoshop CS4 because it caused too many compatibility problems.
I started looking for a solution and found that I already had it on my computer but was not using it as it should be used. The great little program that takes up the slack after Adobe dropped the “Use Adobe Dialog” function is free and it is named FileBox eXtender. It is available in a 32 and 64 bit version. The current version as of March 3, 2010 is version 2.00.04.
Installation is a snap and after the program is installed and opened, you will see the following:
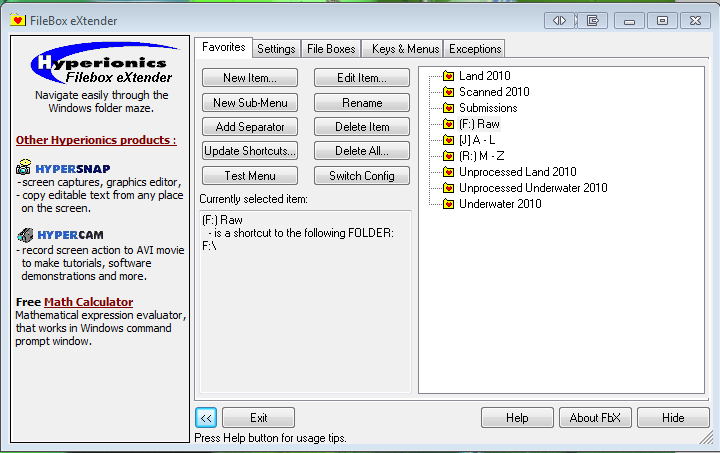
The window on the right hand side of the box will not have any entries in it. To add new ones, click on the “New Item” button and navigate to a folder or dive. You will see the following dialog box:
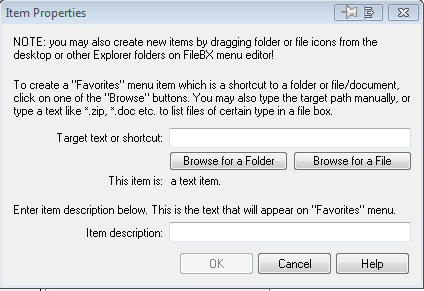
Click on “Browse for a Folder” or “Browse for a File” and navigate to the file, folder or drive that you want to add to the shortcut list. In the example below, I navigated to my F: drive which is where I store my Raw files.
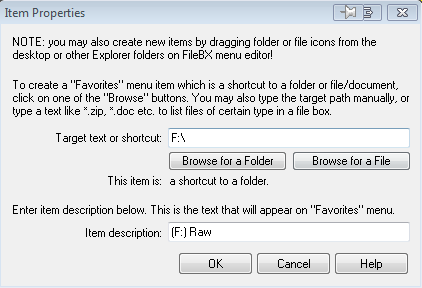
After choosing the target, you can either except the default name in the “Item description” box or you can give it a name of your choosing.
Click “OK’” and it is added to the list. To reorganize the list, you can drag each of the lines into any order that you want. When you are done, click “Hide” on the main screen and you are ready to go. There are many other things that you can do with FileBox eXtender but I am not going to go into them in this blog.
As an example, I have opened a file in Adobe Photoshop CS4 and I am going to save it using the “Save As” menu choice.
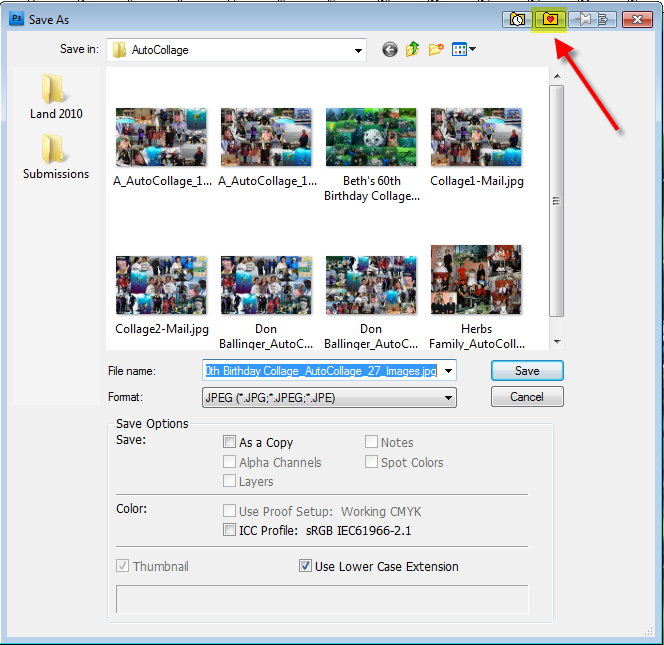
To get your folder, file or drive list, clock on the icon of a file folder with a red heart in it and you get the following dialog box:
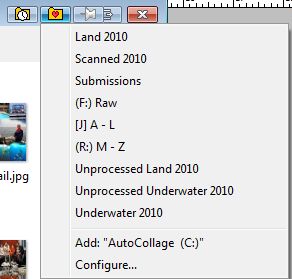
If the folder, file or drive that you want is not on the list, click on “Configure” and add it to the list. If what you are looking for is on the list, click on the appropriate name and you will be taken directly to that file, folder or drive. What’s great about this feature is that it is available in all of your other programs. Sweet and Easy! I am a happy person once again!
© 2010, Herb Segars. All rights reserved.


Awesome!
It was really nice post! Thanks a lot for sharing…