I have talked in the past about the importance of backups. If your home is like ours, we have multiple computers and trying to keep them all backed up can be a real pain. If you have an old computer that is not being used, you might want to think about installing Microsoft Windows Home Server on it and making it a server for your entire house. You can either purchase Home Server on disk or buy a server already configured with Home Server. At newegg.com, the Windows Home Server 32 bit software is selling on 5/2/09 for $99.99 USD with free shipping. Your other option is to buy a home server that is already configured with Home Server software.
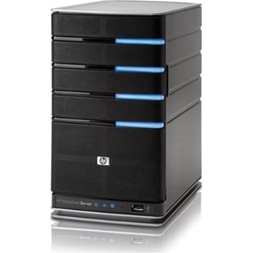
The HP MediaSmart Servers start at $399.99 USD with free shipping from newegg.com. One of the great things about installing Home Server on an old computer is that you don’t need a new, high tech computer to run the software. The minimum requirements cited by Microsoft for Windows Home Server as a 1GHz Pentium III (although a Pentium 4, AMD x64 or newer CPU is recommended) with 512MB of RAM although I have heard that it runs quite well on a 1.2GHz Pentium III with 512MB of RAM and a 160GB hard drive. You will need at least an 80GB hard drive to start your system. I am by no means an expert on Home Server but I would like you to see the benefits of it.
After you install the server software, you will not need a monitor, a keyboard, mouse, or speakers as the server can be accessed from all computers in the household and can also be accessed from the Internet. There are three parts to the server software. There is the installation software that installs Home Server onto your computer. Next is a connector program that you run in each of your home computers to have them connect to the server. Lastly, there is a recovery disk that will allow you to restore any of your computers after a crash or hardware failure.
Here is how my installation went. I installed the software onto the server and everything was pretty straight forward. It asks for a name for the server and the default name is SERVER. It will ask you for a password and you should try and use a very strong password but one that you won’t forget. Make sure to right it down so you don’t forget it. I use a combination of letters, numbers and symbols that has worked well for me. Once the system is installed, its time to add the other computers in your house to the system. At this point, you can disconnect the monitor, keyboard and mouse from the server. You can do anything required of Home Server through one of your home computer. I took the connector files and put them on a USB jump drive and went to each computer and installed the file. It goes very quickly. Once the files are installed, you can connect each of the computer to the home server. You can set up individual users with separate passwords to access the server but for the most part, there is only one person that needs to access the server and that is usually the person that set it up. If you don’t want to set up separate accounts, you can just activate the GUEST account and give everyone in the house the ability to log onto the server through the guest account.
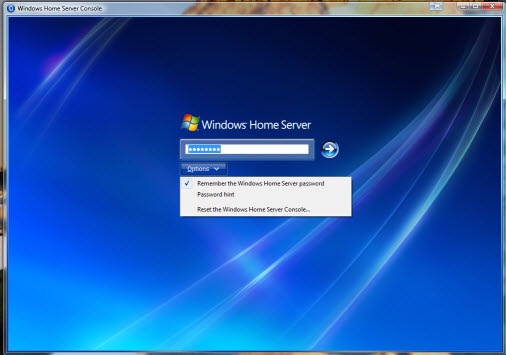
This the Windows Home Server Login screen that you will see on your home computer. You can enter the server password and choose the option to save the password so that you don’t have to enter it every time that you login.
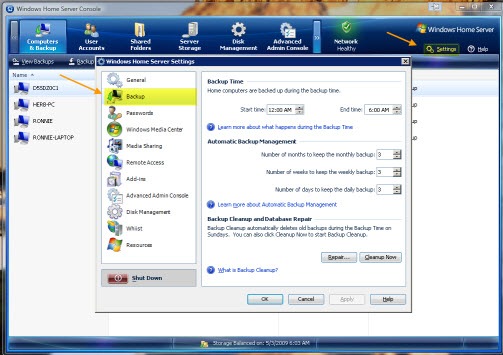
I think that one of the greatest feature of WHS (Windows Home Server) is its ability to back up every computer in our home. We have two laptops and two desktops. WHS is set to automatically backup each computer every night. It uses some interesting program features to do this. It looks at files that are duplicated on each computer and makes only one copy of each of the files but notes where the files are located on each computer. Because of this, the backup size is smaller than the total used capacity of all of your home computer’s hard drives. After the initial backup, WHS makes incremental backups – only including new or changed files. It does its backups from 12:00 am and 6:00 am. You can change the time by logging into the WHS and choosing the Settings button then then the Backup tab.
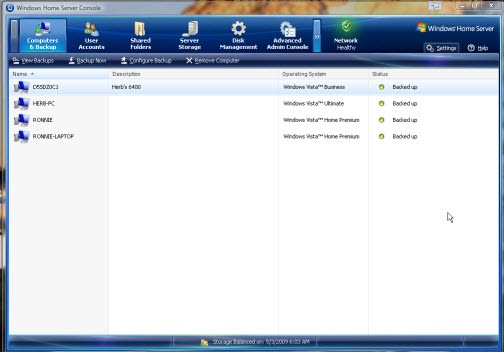
One my initial use of WHS, all four of our computers where backed up in one night. Here is a screen shot of what our system looks like:
WHS does a lot more and I am just beginning to utilize some of those things. One nice feature of WHS is that it monitors the health of each of your computers. WHS has a tray bar icon on each computer and when there is a problem, the tray bar icon turns from green to red and when you put your mouse over the icon it will tell you that a problem exists. You can then log into the server and see what that problem is.
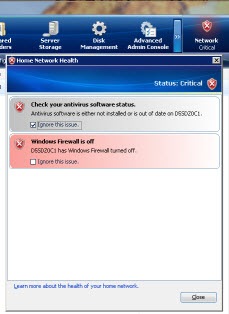
In the case show above, it is telling me that Windows Firewall is off and that I should check the antivirus software on my laptop. I know that I am using a third party antivirus and firewall so I just tick the box that says “Ignore this issue” and the network health status returns to “Healthy” and the tray icon turns green.
Another great thing about WHS is how it handles hard drives connected to the server. It allocates 80GB for the server software and utilizes the rest of the storage space for backups and shared files. You can attach multiple hard drives to the server and increase its storage capacity. It doesn’t care about the size of the drives. It just uses them to increase the storage pool. When I replace a hard drive on my system with a larger one, I take the smaller drive and attach it to the home server. It will prompt you with how the drive should be handled. It can either be added to the pool or it can be ignored by the pool and can be used for other purposes. One might be to take your backups and move then to an external drive and keep them somewhere off premises if a catastrophic event should happen. I do that with our work computers but I have never done that with my home systems.
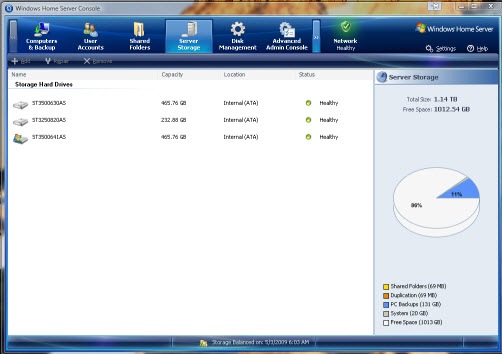
I currently have two 500GB drives and one 250GB drive connected to my WHS and I have used 20GB for the system files, 131GB for the PC Backups, 60MB for the shared folders and 69MB for duplicate shared files.
Once all your computers are backed up, restoring one that crashes is incredibly easy. In the shared files folder found on each of your home PC’s, look in the software folder and then into the Home PC Restore CD folder and you will see a Read Me file which will give you a link to download an ISO file from Microsoft which you should burn to a CD. If your hard drive goes bad, simply replace it, insert the Restore CD and watch it work its magic. You can choose the date that you want to the backup to come from in case you downloaded something that screwed up your machine. I haven’t had to use this yet but from browsing the web, it seems to work extremely well.
I am going to save a discussion about shared files for another time. I wish that I had found WHS a long time ago. It would have changed the way that I do backups for all my home PC’s. For now, it gives me an extra measure of security knowing that all my computers are backup up everyday.
© 2009, Herb Segars. All rights reserved.


2 thoughts on “Microsoft Home Server”