I have tried many methods of trying to remove backscatter from underwater photos. Backscatter happens because the underwater strobe(s) cause reflections from suspended particles in the water. The method that I am going to describe today works with photos taken with a black background. First you might ask, how can I get a black background? You can do so by shooting with a very small lens opening and one that is at least two f-stops smaller than what might be required for an available light exposure. In New Jersey, this isn’t hard because light levels are low underwater on a regular basis. The photo that I am using as an example today was taken at a depth of about sixty to seventy feet deep. At that depth on a normal day in New Jersey, you can take a light meter reading using ISO 200 and the meter hardly moves off the stops. What this means to the underwater photographer is that all the light for the photo comes from the strobe(s). This photo was taken with an ISO of 200, a shutter speed of 1/60th of a second and an f-stop of f14. The camera is a Nikon D200 in a Subal housing with (2) Ikelite DS-125 strobes using TTL. The following photo was the original shot with no preprocessing:
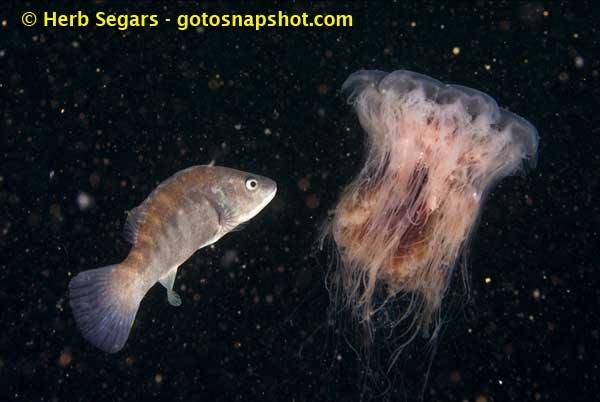
What we have here is a bergall (also known as a cunner), a member of the wrasse family checking out a Lion’s mane jellyfish. I have seen bergalls taking bites out of the jellyfish in the past although it is a behavior that I don’t see on a regular basis – mainly because I don’t see lion’s mane jellyfish near the bottom where bergalls hang out. As you can see, there is a lot of backscatter in the photo. I have tried a lot of methods to remove this from photos but this is a brand new method that looks really good. So far, it only works on photos with a black background. Initially, you could open this photo in Adobe Photoshop CS4 and set the black point for the background to be sure that it is a solid black color but in this case, I did not do that. From Adobe Bridge, I right clicked on the photo and choose “Open in Camera Rawâ€.

I clicked on the “Adjustment Brush†in the top toolbar. It is the fifth icon from the right.
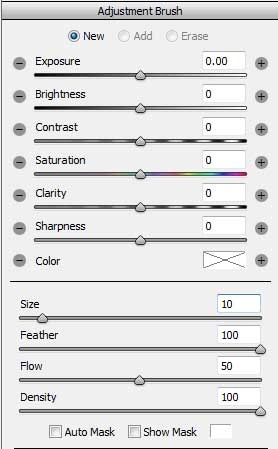
This brings up the “Adjustment Brush†dialog box. My interest was to reduce the exposure on the backscatter.
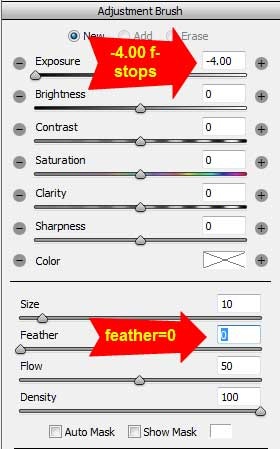
I chose to move the exposure slider to the left to –4 f-stops of exposure. At the bottom of the “Adjustment Brush†dialog box are the sliders for the adjustment brush. I chose a size of “10†and a feather of “0â€. The feather of “0†gave me a hard edged brush so that I wouldn’t feather any of my brush into the main subjects – the bergall and the lion’s mane jellyfish. I left the flow and density at their defaults.
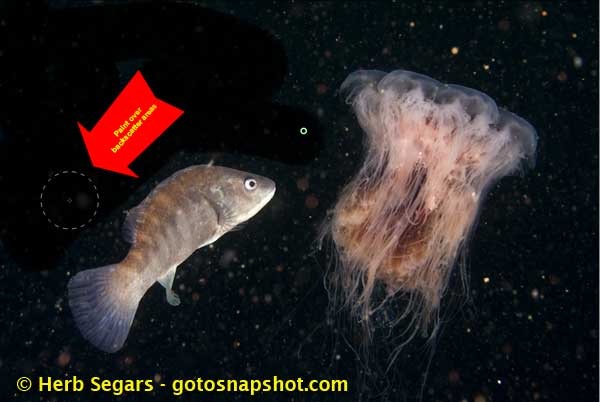
I started to paint around the subjects, making sure that I did not get too close. If you make a mistake, you can go to the adjustment brush dialog box and click on the “erase†button at the top of the box and brush away any areas that you don’t want the –4 stop exposure to affect.
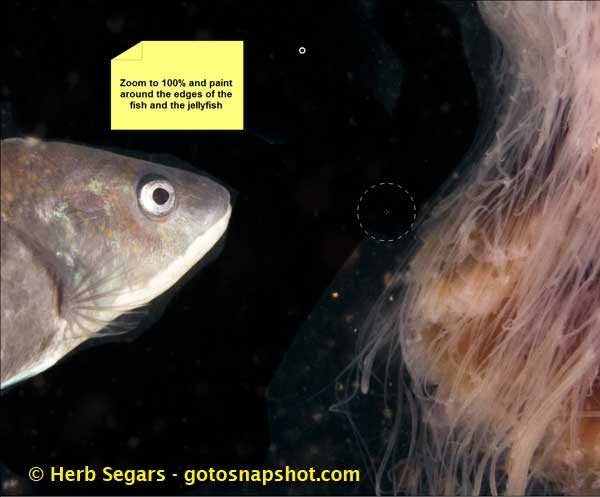
Once the large areas were done, I changed my zoom to 100% and painted out areas that were close to the bergall and the lion’s mane jellyfish. When you change the zoom, the brush changes to accommodate the new view. You can see the sizes of the brush in the two photos above. I did not make any size changes when I zoomed in.
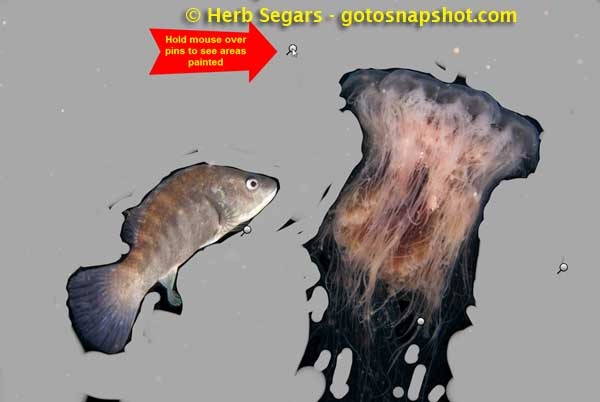
Zooming out to “Fit on Screenâ€, I checked my brushing by holding my mouse over one of the pins on the screen. In this screen, you can see four pins. Each pin is placed when I start a new adjustment brush. For example, if I started with my original brush using –4 stops underexposure and found that I made a mistake and choose “Erase†to remove a bad area. When I choose “Add†and started painting with the –4 f-stop exposure brush again, a new pin would be seen on the page. It is not a big deal, you just have to know that it happens.
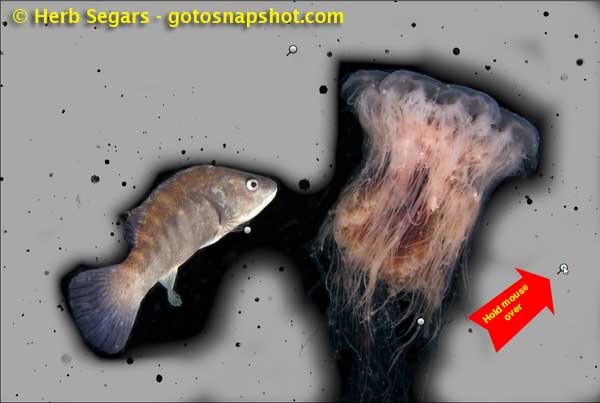
I am holding my mouse over another pin to see what areas it has affected. After spending a few minutes cleaning up more areas, here is the final result:
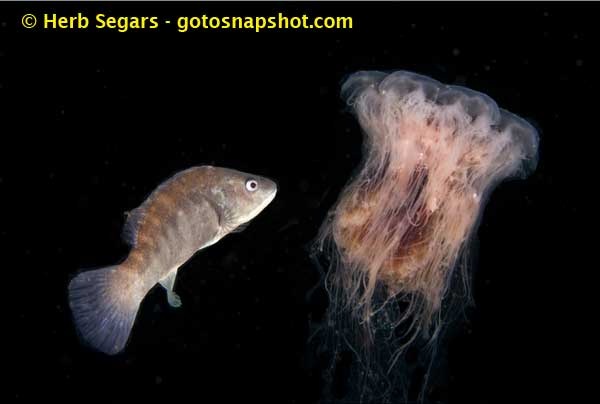
I have tried many methods of removing backscatter in the past but I am really happy with this one. In some of the other methods that I have used, I have found that when I zoomed in, I would see noise in the main subject but there was no noise in the areas that I fixed. This looked pretty fluky and I knew that it wouldn’t work. The next view is of a 100% crop of the bergall. You can see that it looks really good.
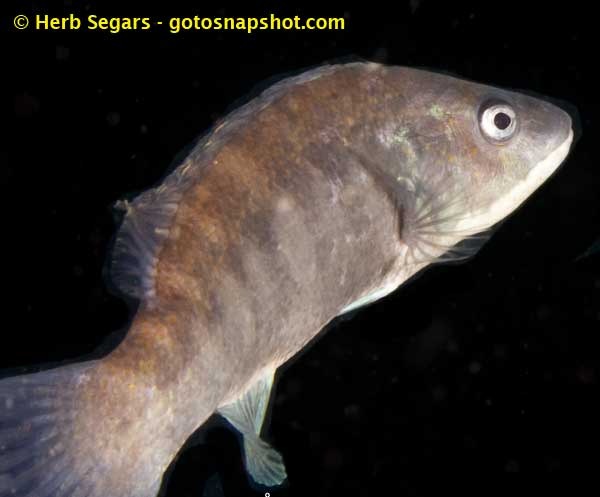
You can see that there is no difference in noise between the fish and the black background. This really worked well for me.
Here is another really great tip when using Adobe Camera Raw 5. Try using the “Clarity†slider on your photos. You will be amazed on how much it helps your pictures. I took some photos that I thought were pretty sharp and used the “Clarity†slider on them and I was amazed at how much better then looked.
Finally, as an observation, Veronica and I attended the Camera Show at the Jacob Javits Center in New York City this weekend. We didn’t think that it was particularly well attended as other years in the past and that could be because of the economy. What we did see is that the majority of clusters of people were found at the software vendors. We saw lots of people at the Adobe area, the OnOne Software area, the Live Books area and the Vertis Fluid Mask area. This tells me that digital photography is exciting people and that the software that supports digital photography excites people even more.
I met a fellow who took some of my underwater photography courses many years ago and he was telling me how well he was doing with his photography and I was elated. He did tell me that he was struggling with the computer end of digital photography. I can tell all of you this. If you are going to embrace digital photography, you are going to have to master the computer end of it. I believe that there will be mediocre photographers who are great with the computer that will produce images that are better than better photographers who are not proficient with computers. That’s not the way that it used to be but I am afraid that that is the way of the future. Don’t be afraid of technology, use it to make yourself better.
© 2008, Herb Segars. All rights reserved.


After examine just a few of the blog posts on your
web site now, and I really like your method of blogging.
I
bookmarked it to my bookmark website checklist and can be
checking again soon. Pls try my website
online as properly and let me know what you think.
My web blog :: [url=https://livemissionmars.com/forum/profile.php?id=3548]https://livemissionmars.com/forum/profile.php?id=3548[/url]